How to Weld Aluminum
Introduction
Aluminum is a lightweight, versatile, and corrosion-resistant metal that is widely used in various industries, such as automotive, construction, aviation, and marine. Welding aluminum can be a challenging task compared to other metals, due to its unique properties and the need for specific welding techniques. In this article, we will explore the essential steps and tips needed to weld aluminum effectively and efficiently.
Selecting the Right Equipment
Before starting the welding process, it’s crucial to gather the proper tools and equipment. The most common welding techniques used for aluminum are Gas Tungsten Arc Welding (GTAW) or Tungsten Inert Gas (TIG) welding, and Gas Metal Arc Welding (GMAW) or Metal Inert Gas (MIG) welding. While TIG welding requires more skill and precision, MIG welding can be faster but may result in a less clean finish. Choose the method that best suits your requirements and skill level.
To weld aluminum successfully, you will also need:
1. A high-quality welding machine with adjustable AC/DC settings
2. Appropriate filler materials compatible with the specific aluminum alloy
3. A non-consumable tungsten electrode (for TIG welding)
4. Proper safety gear like gloves, helmet, protective clothing, and safety glasses
Preparing the Aluminum
Before you start welding aluminum:
1. Clean the surface: Remove any dirt, grease, or oxide layer from the workpiece by using a stainless-steel brush or solvents specifically designed for cleaning aluminum surfaces.
2. Preheat if necessary: Thicker aluminum workpieces might require preheating to reduce the risk of distortion or cracking. Check manufacturer recommendations for appropriate preheat temperatures.
3. Select suitable filler material: Choose a filler material that is compatible with your specific aluminum alloy to ensure strong welds.
Welding Process
It’s essential to master your selected welding technique (TIG or MIG) and familiarize yourself with the specific requirements for aluminum welding:
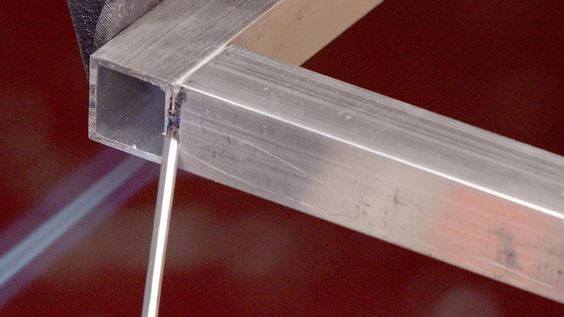
For TIG Welding:
1. Set your welding machine to AC polarity.
2. Choose a suitable tungsten electrode, usually made of pure tungsten or alloyed tungsten.
3. Sharpen the electrode and create a pointed tip for better arc control.
4. Set the amperage according to the aluminum thickness and selected electrode type.
5. Insert the filler rod into the weld pool, keeping it within the shielding gas area.
6. Maintain proper torch angle and distance from the workpiece for stable arc control.
For MIG Welding:
1. Set your welding machine to DC+ (Direct Current Electrode Positive) polarity.
2. Select a suitable wire feed speed and voltage setting according to aluminum thickness.
3. Use an appropriate aluminum welding wire diameter and composition compatible with your specific aluminum alloy.
4. Employ a push technique when working with aluminum; pulling may lead to incomplete fusion.
5. Adjust travel speed to ensure even distribution of heat, avoiding overexposure or lack of penetration.
Post-Weld Cleaning and Finishing
After completing the weld, it’s essential to perform post-weld cleaning and finishing:
1. Allow the workpiece to cool down completely before handling.
2. Remove any oxide layer formed during the welding process by using a stainless-steel brush.
3. Inspect welds for cracks, porosity, or other defects.
4. Apply any necessary surface treatments or coatings as required by industry standards or project specifications.
Conclusion
Welding aluminum can be challenging due to its unique properties but can be done effectively if you follow proper procedures, use appropriate equipment, and practice your skills regularly. Whether using TIG or MIG welding techniques