How to Apply AirStone
AirStone is an innovative, lightweight, and easy-to-install wall covering that adds a touch of elegance to any space. With its textured finish and unique look, AirStone can transform an ordinary room into a stunning living area. This article will provide step-by-step instructions on how to apply AirStone to create the perfect accent piece for your home.
Step 1: Gather Your Materials
Before you begin the application process, make sure you have all the necessary materials on hand. You will need:
– AirStone wall covering (available in various colors and styles)
– Adhesive (AirStone suggests using their recommended adhesive for best results)
– Putty knife or trowel
– Measuring tape
– Level
– Miter or hand saw (optional)
– Sanding block (optional)
– Clean damp cloth
Step 2: Prepare the Surface
Before applying AirStone, it’s crucial to prepare the surface properly. The wall should be clean, dry, and free from debris. Wipe down the surface with a clean damp cloth to remove any dust or dirt. For painting surfaces, ensure that paint is fully cured before proceeding.
Step 3: Plan Your Layout
To achieve a professional-looking finish, it’s essential to plan your layout before starting the installation process. Measure the width and height of the area where you want to install AirStone and mark lines accordingly.
Use the measuring tape and level to ensure straight lines and precise measurements. Consider starting at the bottom center of your wall and working outward in both directions to create a balanced look.
Step 4: Apply Adhesive
Apply adhesive with a putty knife or trowel to both the back of each AirStone piece and on the wall where it will be installed. Spread the adhesive evenly, covering at least 95% of each surface.
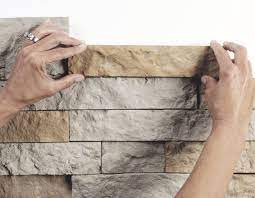
Step 5: Install the AirStone Pieces
Press each AirStone piece firmly onto the wall, ensuring proper alignment and fit. Twist the piece slightly to set it in place and make sure the adhesive has good contact. For an organic look, mix stones of various sizes and colors.
Step 6: Cut and Trim (Optional)
If you need to create a custom-size piece, use a miter or hand saw to cut AirStone along the desired line. With a sanding block, smooth rough-cut edges for a neat finish.
Step 7: Clean Up
Once all AirStone pieces are in place and adhesive has dried, inspect your work and clean any excess adhesive with a damp cloth. Allow the entire installation to dry for at least 24 hours.
By following these seven simple steps, you can transform your living space with the elegant and timeless look of AirStone. Whether you’re creating a feature wall, updating your fireplace, or adding texture and dimension to any room in your home – working with AirStone is a user-friendly experience that delivers impressive results.